
A demo request lands at 4:05pm on a Tuesday. Your team sees it, but they’re heads-down wrapping calls before EOD. It can wait until morning. By Wednesday at 9am, the prospect has already taken a call with your competitor — who called them back at 4:08pm Tuesday.
Converting them from your site wasn’t the problem. The 17-hour gap was.
Leads are 21 times more likely to convert if you contact them within five minutes, according to a study conducted by MIT. Tuesday at 4:08pm was the point of highest interest. By Wednesday morning, you were already losing.
But what if that lead got a call back within minutes even if your team isn't immediately available?
Here’s how to build a set-it-and-forget it inbound funnel in Close in five steps.
1. Capture the Lead Cleanly with a Form
Close Forms are the top of your funnel. They’re embeddable web forms that drop every submission straight into your CRM as a new lead. If you’re an old school Close user, you know this used to require Zapier integrations with third party form tools.
Thankfully, those days are long gone because forms live natively inside Close now.
A few rules for the form itself:
- Ask 3–5 questions. Don’t overdo it here. Every extra field is a chance for the prospect to bail.
- Include a couple of qualifying questions you’d ask on a call anyway: budget range, team size, what they’re trying to solve. Map them to custom fields on the lead.
- Skip anything you can enrich automatically later. Reduce all friction for your leads.
The form submission is just the foundation. Next, you need to make sure your lead is on a high-speed journey down your funnel.
2. Trigger a Workflow the Moment the Form is Submitted
Workflows are Close’s automation engine. They let you say: when this thing happens, run this sequence of actions automatically.
For an inbound funnel, the “thing that happens” is a form submission. Build a new Workflow, set the trigger to Form submission event, and pick the form you just built. From this point on, every submission kicks off the funnel — no one has to watch an inbox, no one has to remember to assign anything.
You can also add filters here. If you want the Workflow to fire only for leads who answered “$10k+” on the budget question, that’s one click.
3. Set the Lead Status and Assign Ownership
Once the Workflow fires, the first thing it should do is bring some order to the chaos: set a consistent lead status and decide who owns this lead.
Add two steps:
- Update Lead Status to something like “Inbound — New.” Every form-submitted lead now starts in the same place in your pipeline, which makes reporting and prioritization a lot less of a guessing game.
- Assign the lead. You can round-robin across your sales team, route to a specific rep, or assign to a group. This way, the lead automatically has a clear owner within seconds. No more dropped balls.
This is also where you decide who actually makes the first call. Which brings us to the part of the funnel that does the heavy lifting.
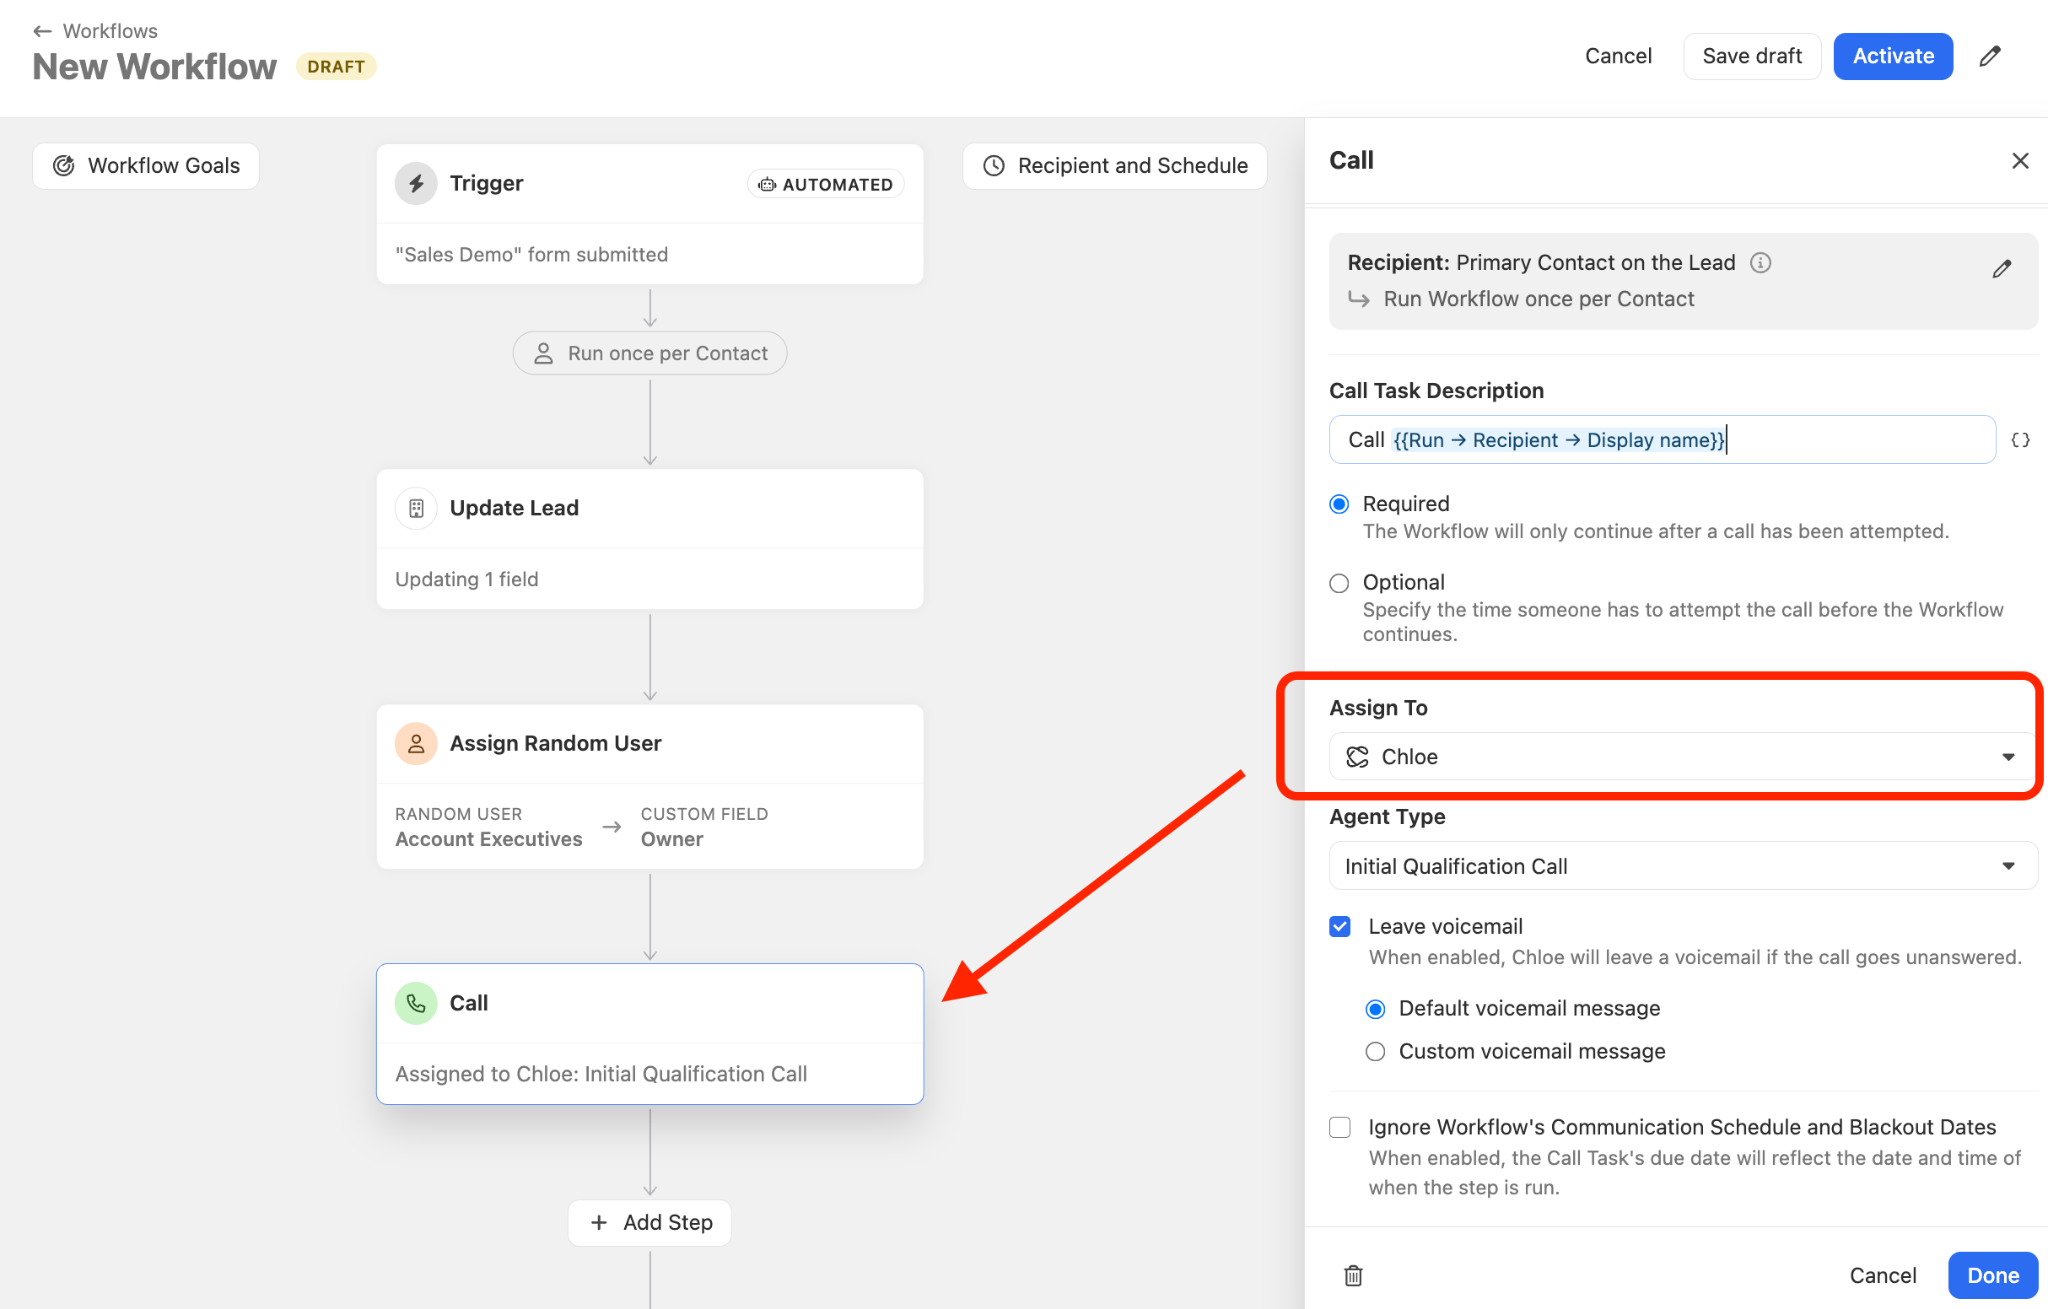
4. Add a Call Step — and Assign It to Chloe
The moment a lead fills out your form is the highest point of interest. The most valuable you thing you can do right now is have someone call them back within a couple of minutes.
If that’s not possible, automate the calling with Chloe, the AI sales teammate built directly into Close.
Chloe can call a new lead moments after submitting your form, answer their questions about your business, qualify them instantly, and book a meeting on your rep’s calendar.
Every call is recorded, transcribed, and saved in Close — so before you walk into the meeting she booked for you, you can pull up the recording, skim the transcript, and know exactly what was said.
Benjamin Pace, founder of ClientMatchmaking.com says, “I've had nothing but positive remarks and instant live transfers from Chloe. So anyone that's scared that their clients are even going to be upset or turned off by it, don't be. It is just noise. Chloe’s doing nothing but affecting my bottom line in a positive way.”
So how do you trigger a Chloe call to your fresh new leads?
Add a Call step to your Workflow. In the assignment dropdown, instead of picking a human rep, pick Chloe and select the Agent you want her to use for inbound demo requests. That’s it. Now, the moment a form is submitted, Chloe places a real voice call to the prospect — typically within minutes.
When your team logs in the next morning, they don’t see a backlog of cold leads to chase. They see a calendar of qualified meetings, each one already attached to a call recording and a summary.
5. Set a Goal for the Workflow (e.g. Meeting Booked)
The last piece is what happens after Chloe’s call.
Workflow Goals are the cleanest way to handle this. A Goal is an event that automatically pauses the run when it happens — and “Meeting booked” is one of them. If Chloe books a meeting, the Workflow stops. The lead is now a qualified meeting on someone’s calendar, and you don’t need to send them another email.
If she doesn’t book — say the lead didn’t answer, or they’re not ready yet — the Workflow keeps going. You can add follow-up steps: a text an hour later, an email the next morning, a second Chloe call two days out. The funnel keeps working until the lead either converts or clearly disqualifies.
That same demo request from Tuesday at 4:05pm? Under this setup, it gets a call at 4:07pm, a meeting on the calendar by 4:14pm, and a confirmation email by 4:15pm. Wednesday morning, your rep walks into a booked discovery call instead of a missed opportunity.
Stop Building a Funnel That Sleeps When You Do
Speed-to-lead isn’t a discipline problem. It’s a design problem. Most inbound funnels are built to depend on a human being at a keyboard at the right moment — and human beings have lives, lunch breaks, and 4:05pm. The fix isn’t more hustle. It’s a funnel that doesn’t need anyone watching it.
Forms catch the lead. The Workflow takes over instantly. Chloe makes the call your team couldn’t. By the time you’re back at your desk, the meeting is on the books.
Want to see what instant speed-to-lead actually looks like? Start a free Close trial and build this workflow yourself.